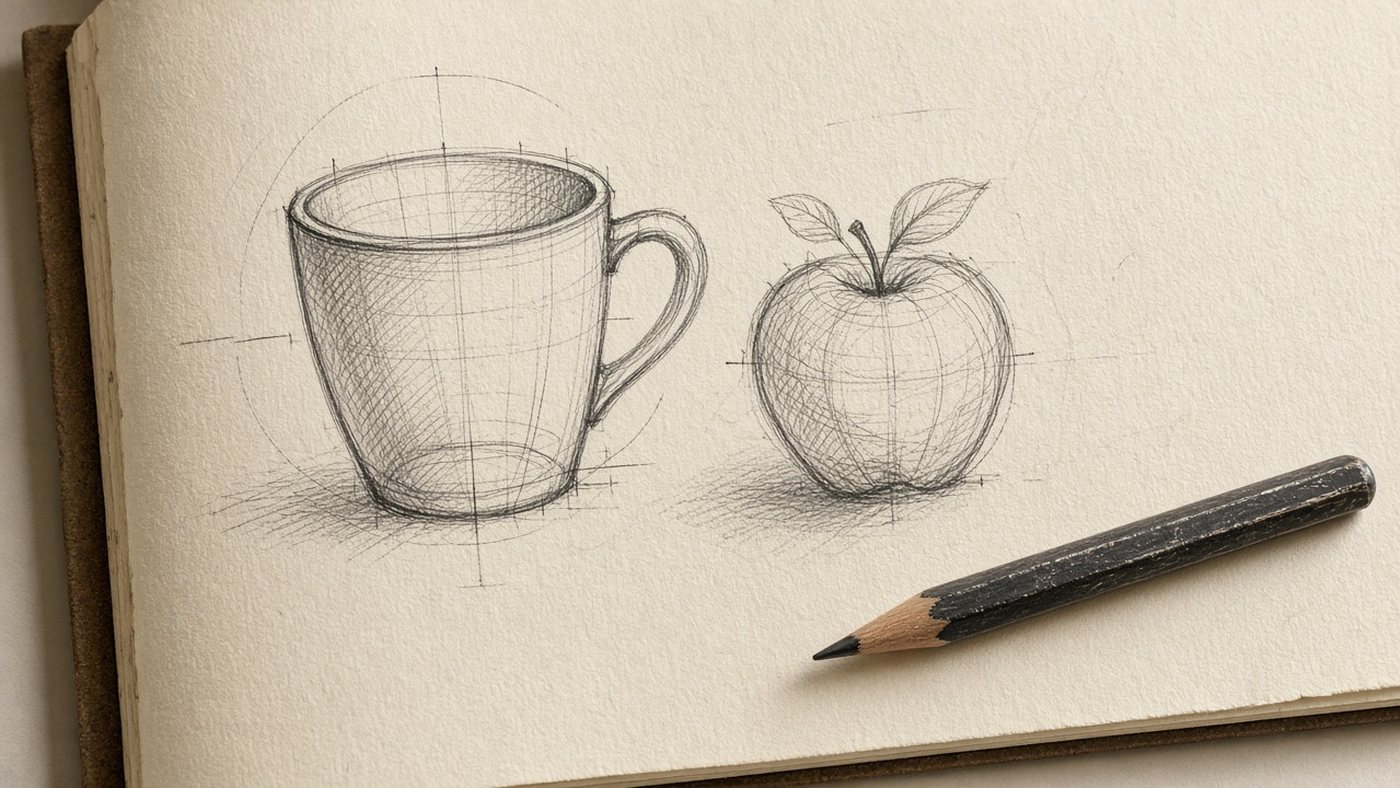
What to Buy Without Going Broke
Your first trip to the art aisle often ends with a twenty-four-pencil tin and a glossy sketchbook. Within a week the gloss scratches graphite, soft cores snap in the sharpener, and half the grades never leave the foam. I tell beginners to start with three items and one rule: replace tools only when they are actually worn out, not when a influencer unboxes something new.
People ask which brand is "best." For the first months the gap between student and premium matters less than the gap between daily practice and gear collecting. Spend on paper and on understanding why each hardness exists; the rest you can add when tasks demand it.
Three Pencils Instead of a 24-Pack
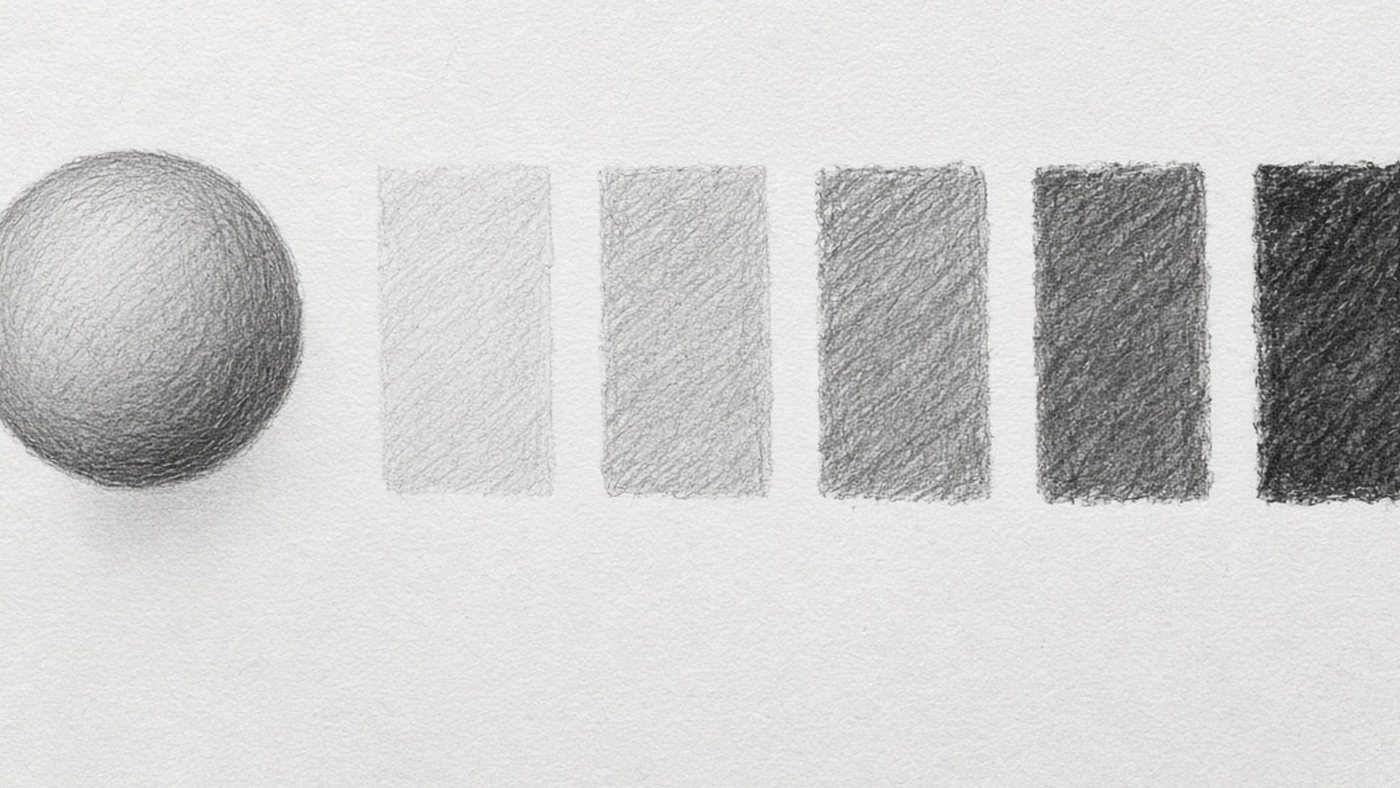
HB holds contour and a light layout: the line reads clearly and the sheet does not darken instantly. 2B builds tone quickly for value strips and simple volumes. 4B or 6B only after you can stop leaning with your elbow; otherwise the page shines through after two layers. A sharpener with a shavings cup and one kneaded eraser finish the kit. For the full scale, read graphite HB, 2B, and 8B.
A set "from 9H to 9B" sells the dream of professionalism, but for a beginner it adds choice fatigue. You compare swatches instead of repeating the same shoulder arc. I have seen students draw only with 8B for a month because "it is the blackest," then wonder why the sketch turns to mud.
On a tight budget, two pencils work: HB and 2B. HB for line and first contours, 2B for shadow. A fourth pencil—a hard 2H—helps when you lift highlights with an eraser and do not want to smudge light zones while refining.
Do not cheap out on the sharpener: a bad one chews wood, breaks lead, and leaves burrs that gouge paper. Keep a spare stick in your case; it saves a lesson when the tip dies mid-stroke.
When a student brings an "artist kit" with watercolor and charcoal, we still draw graphite only for the first two evenings. Mixing media before the hand is stable means you cannot tell which habit broke the drawing.
Teaching three pencils instead of a 24-pack inside "What to Buy Without Going Broke" only sticks when the student names the goal out loud. I ask for one sentence before the pencil moves: what should look different on the page in ten minutes? Without that, what to buy without going broke turns into doodling.
A checkpoint I use for three pencils instead of a 24-pack: daylight photo, zoom to one quarter of the sheet, compare to yesterday. If nothing moved, the issue is almost never talent—it is usually pressure, angle, or skipping the warm-up tied to what to buy without going broke.
When three pencils instead of a 24-pack feels stuck, shrink the task and lengthen the setup. Smaller format, two extra minutes of shoulder lines, same subject. Students who try to "power through" what to buy without going broke on a tired hand reinforce shake instead of fixing it.
Last month a student improved three pencils instead of a 24-pack by logging a single number after each session—line quality one to five. The drawings were not pretty for two weeks, but the curve climbed because what to buy without going broke stopped being a vague complaint and became a metric.
Paper: Tooth vs Smoothness
Printer paper feels convenient until you try to stretch a halftone. Smooth sheets polish graphite into a shiny band. Heavy watercolor tooth eats lead and gives fluffy hatch you cannot steer.
For pencil study use 120–160 gsm with medium grain: Canson Drawing, Fabriano Academia, or a local equivalent. The sheet should whisper under HB without grabbing like sandpaper. Grain and tone are summarized in the drawing paper overview on Wikipedia—worth one read so you stop guessing at the shelf.
Letter-size (A4) fits a home desk and scans without cropping. If you work only in A5, extend the warm-up—small wrist arcs invite shake more than large sheets.
Store sheets flat or under weight. One bent corner on a stack of fifty becomes fifty annoyances. Ring binders are fine for notes, but rings fight rotation; for practice I prefer loose sheets on a clipboard.
Teaching paper: tooth vs smoothness inside "What to Buy Without Going Broke" only sticks when the student names the goal out loud. I ask for one sentence before the pencil moves: what should look different on the page in ten minutes? Without that, what to buy without going broke turns into doodling.
A checkpoint I use for paper: tooth vs smoothness: daylight photo, zoom to one quarter of the sheet, compare to yesterday. If nothing moved, the issue is almost never talent—it is usually pressure, angle, or skipping the warm-up tied to what to buy without going broke.
When paper: tooth vs smoothness feels stuck, shrink the task and lengthen the setup. Smaller format, two extra minutes of shoulder lines, same subject. Students who try to "power through" what to buy without going broke on a tired hand reinforce shake instead of fixing it.
Last month a student improved paper: tooth vs smoothness by logging a single number after each session—line quality one to five. The drawings were not pretty for two weeks, but the curve climbed because what to buy without going broke stopped being a vague complaint and became a metric.
Kneaded Eraser and More
A pink eraser removes everything at once and leaves halos. A kneaded eraser lifts graphite in points—highlights on an apple, a light edge on a cube. Keep it clean by blotting on scrap paper or gray returns to the sheet.
Fixative is not needed in month one. First learn not to rest your palm on the drawing—slip a scrap under your hand or work top to bottom if you are right-handed.
A 0.5 mm mechanical pencil with HB lead helps for tiny notes but does not replace wood for hatching: wood gives tilt and line width a clutch cannot mimic.
Teaching kneaded eraser and more inside "What to Buy Without Going Broke" only sticks when the student names the goal out loud. I ask for one sentence before the pencil moves: what should look different on the page in ten minutes? Without that, what to buy without going broke turns into doodling.
A checkpoint I use for kneaded eraser and more: daylight photo, zoom to one quarter of the sheet, compare to yesterday. If nothing moved, the issue is almost never talent—it is usually pressure, angle, or skipping the warm-up tied to what to buy without going broke.
When kneaded eraser and more feels stuck, shrink the task and lengthen the setup. Smaller format, two extra minutes of shoulder lines, same subject. Students who try to "power through" what to buy without going broke on a tired hand reinforce shake instead of fixing it.
Last month a student improved kneaded eraser and more by logging a single number after each session—line quality one to five. The drawings were not pretty for two weeks, but the curve climbed because what to buy without going broke stopped being a vague complaint and became a metric.
Start today
Buy HB, 2B, a kneaded eraser, and ten sheets of medium-tooth paper. Spend one evening on the value scale—without that, the pencil will feel "disobedient."
Grip and Motion: Where the Shaking Comes From
Shake is rarely "nerves." Usually the lever is too short—you draw from the fingers while the pencil stands vertical and digs in. Change support and angle and the line often calms in one session.
On day one I ask for twenty parallel lines: ten "as usual," ten with pinky anchored and motion from the elbow. The difference shows without a magnifier. If you lack a mirror, film ten seconds on your phone—one frame reveals a clenched hand.
Shoulder, Elbow, or Wrist
Long straights and big arcs come from the shoulder: elbow slides on the desk, wrist almost locked. Medium hatch from the elbow. Small detail and tight hatch from the wrist, but with pinky resting on the paper.
Place the sheet slightly left of center (right-handers) so the elbow is not pinned to your ribs. Clip a corner lightly so you are not dragging the page with your off hand.
During warm-up forbid strokes shorter than two inches for five minutes. It is blunt, but it exposes how much you rely on the fingers alone.
Left-handers mirror the setup: sheet to the right, support under the pinky or palm heel—the goal is a hand that is not floating.
Teaching shoulder, elbow, or wrist inside "Grip and Motion: Where the Shaking Comes From" only sticks when the student names the goal out loud. I ask for one sentence before the pencil moves: what should look different on the page in ten minutes? Without that, grip and motion: where the shaking comes from turns into doodling.
A checkpoint I use for shoulder, elbow, or wrist: daylight photo, zoom to one quarter of the sheet, compare to yesterday. If nothing moved, the issue is almost never talent—it is usually pressure, angle, or skipping the warm-up tied to grip and motion: where the shaking comes from.
When shoulder, elbow, or wrist feels stuck, shrink the task and lengthen the setup. Smaller format, two extra minutes of shoulder lines, same subject. Students who try to "power through" grip and motion: where the shaking comes from on a tired hand reinforce shake instead of fixing it.
Last month a student improved shoulder, elbow, or wrist by logging a single number after each session—line quality one to five. The drawings were not pretty for two weeks, but the curve climbed because grip and motion: where the shaking comes from stopped being a vague complaint and became a metric.
Pencil Angle to the Paper
A pencil at ninety degrees scratches. Tilt thirty to forty-five degrees: the lead slides on its side, the stroke softens, width grows without extra force.
For tonal fills use a "flat" facet of the core: rotate after sharpening instead of working on a needle point. One pass covers a band instead of plowing a groove.
If the line still skips, check sharpener and paper before blaming grip. Sometimes the same angle with 2B instead of HB is enough.
Teaching pencil angle to the paper inside "Grip and Motion: Where the Shaking Comes From" only sticks when the student names the goal out loud. I ask for one sentence before the pencil moves: what should look different on the page in ten minutes? Without that, grip and motion: where the shaking comes from turns into doodling.
A checkpoint I use for pencil angle to the paper: daylight photo, zoom to one quarter of the sheet, compare to yesterday. If nothing moved, the issue is almost never talent—it is usually pressure, angle, or skipping the warm-up tied to grip and motion: where the shaking comes from.
When pencil angle to the paper feels stuck, shrink the task and lengthen the setup. Smaller format, two extra minutes of shoulder lines, same subject. Students who try to "power through" grip and motion: where the shaking comes from on a tired hand reinforce shake instead of fixing it.
Last month a student improved pencil angle to the paper by logging a single number after each session—line quality one to five. The drawings were not pretty for two weeks, but the curve climbed because grip and motion: where the shaking comes from stopped being a vague complaint and became a metric.
Why Heavy Pressure Kills Halftones
Paper is springy: one brutal stroke can crush the tooth. After that graphite skates on polished fiber and you press harder—dark shiny bars with no steps between.
Halftone comes from light layers, not fist pressure. Imagine the pencil weighs twice what you think and you must not nail it into the desk.
Compare two one-inch squares: press to the limit in one, build five passes of HB at "envelope signature" pressure in the other. The second square later blends into neighbors—the base for blending without mud.
When someone says "the pencil will not erase," the first layer was almost always too hard. A kneaded eraser helps little; relight the zone or accept a darker range there.
Teaching why heavy pressure kills halftones inside "Grip and Motion: Where the Shaking Comes From" only sticks when the student names the goal out loud. I ask for one sentence before the pencil moves: what should look different on the page in ten minutes? Without that, grip and motion: where the shaking comes from turns into doodling.
A checkpoint I use for why heavy pressure kills halftones: daylight photo, zoom to one quarter of the sheet, compare to yesterday. If nothing moved, the issue is almost never talent—it is usually pressure, angle, or skipping the warm-up tied to grip and motion: where the shaking comes from.
When why heavy pressure kills halftones feels stuck, shrink the task and lengthen the setup. Smaller format, two extra minutes of shoulder lines, same subject. Students who try to "power through" grip and motion: where the shaking comes from on a tired hand reinforce shake instead of fixing it.
Last month a student improved why heavy pressure kills halftones by logging a single number after each session—line quality one to five. The drawings were not pretty for two weeks, but the curve climbed because grip and motion: where the shaking comes from stopped being a vague complaint and became a metric.
A 15-Minute Warm-Up Before Every Session
Warm-ups get skipped because "I want to draw the cat now." Ten minutes later the cat is crooked, mood drops, and the pencil is guilty. Fifteen minutes before the main task is insurance for the line.

I set a phone timer and do not open reference until it rings. Students who do this for a week complain about shake less than those who jump straight to complex subjects.
Straight Lines and Arcs From the Shoulder
Start with twenty horizontals across the sheet. Look at the far point, not the tip. Then twenty verticals and twenty diagonals each way. Lines may wobble—the goal is tempo, not perfection.
Add large arcs: half circles edge to edge like a bridge. If the elbow locks, the arc corners— you are back on the wrist. A sliding cloth under the elbow helps on sticky tables.
For a ready list, reuse drills from creative warm-up exercises on days when you want zero planning.
Teaching straight lines and arcs from the shoulder inside "A 15-Minute Warm-Up Before Every Session" only sticks when the student names the goal out loud. I ask for one sentence before the pencil moves: what should look different on the page in ten minutes? Without that, a 15-minute warm-up before every session turns into doodling.
A checkpoint I use for straight lines and arcs from the shoulder: daylight photo, zoom to one quarter of the sheet, compare to yesterday. If nothing moved, the issue is almost never talent—it is usually pressure, angle, or skipping the warm-up tied to a 15-minute warm-up before every session.
When straight lines and arcs from the shoulder feels stuck, shrink the task and lengthen the setup. Smaller format, two extra minutes of shoulder lines, same subject. Students who try to "power through" a 15-minute warm-up before every session on a tired hand reinforce shake instead of fixing it.
Last month a student improved straight lines and arcs from the shoulder by logging a single number after each session—line quality one to five. The drawings were not pretty for two weeks, but the curve climbed because a 15-minute warm-up before every session stopped being a vague complaint and became a metric.
Spirals and "Clouds"
A spiral from the center outward trains even pressure change: slightly darker inside, lighter outside. "Clouds" are loose oval scribbles without outline—they prep the hand for form hatch.
Do not turn the spiral into a snaily outline. No contour here—only path. If the spiral drifts oval, rotate the sheet ninety degrees and repeat.
Draw the third cloud with a different grade (2B after HB) to feel hardness on the same motion.
Teaching spirals and "clouds" inside "A 15-Minute Warm-Up Before Every Session" only sticks when the student names the goal out loud. I ask for one sentence before the pencil moves: what should look different on the page in ten minutes? Without that, a 15-minute warm-up before every session turns into doodling.
A checkpoint I use for spirals and "clouds": daylight photo, zoom to one quarter of the sheet, compare to yesterday. If nothing moved, the issue is almost never talent—it is usually pressure, angle, or skipping the warm-up tied to a 15-minute warm-up before every session.
When spirals and "clouds" feels stuck, shrink the task and lengthen the setup. Smaller format, two extra minutes of shoulder lines, same subject. Students who try to "power through" a 15-minute warm-up before every session on a tired hand reinforce shake instead of fixing it.
Last month a student improved spirals and "clouds" by logging a single number after each session—line quality one to five. The drawings were not pretty for two weeks, but the curve climbed because a 15-minute warm-up before every session stopped being a vague complaint and became a metric.
When to Stop
Stop when the line stops tearing in the first inches and the wrist does not ache. That is usually twelve to fifteen minutes, not forty. Endless warm-up without a main task tires you too.
If shake returns five minutes into the drawing, do five more minutes of shoulder lines and return—normal cycle, not failure.
Note warm-up time and line quality 1–5 in the corner. In a week the numbers climb without "talent magic."
Teaching when to stop inside "A 15-Minute Warm-Up Before Every Session" only sticks when the student names the goal out loud. I ask for one sentence before the pencil moves: what should look different on the page in ten minutes? Without that, a 15-minute warm-up before every session turns into doodling.
A checkpoint I use for when to stop: daylight photo, zoom to one quarter of the sheet, compare to yesterday. If nothing moved, the issue is almost never talent—it is usually pressure, angle, or skipping the warm-up tied to a 15-minute warm-up before every session.
When when to stop feels stuck, shrink the task and lengthen the setup. Smaller format, two extra minutes of shoulder lines, same subject. Students who try to "power through" a 15-minute warm-up before every session on a tired hand reinforce shake instead of fixing it.
Last month a student improved when to stop by logging a single number after each session—line quality one to five. The drawings were not pretty for two weeks, but the curve climbed because a 15-minute warm-up before every session stopped being a vague complaint and became a metric.
Three Exercises for the First Week
A week is short enough for the hand to remember new pressure. Do each exercise on its own evening; on day four repeat the weakest. The rhythm fits the 30-day learning plan if you want structure.
20 Identical Circles
Light a four-inch square. Inside draw twenty circles of one diameter without a compass. Circles should touch or nearly touch so size stays honest.
Mark centers with HB dots first. Trace the rim from the shoulder in short arcs—do not close with a jerk. Compare circle 20 to circle 1 on your phone; the gap surprises most people.
If circles turn egg-shaped, check whether the off hand crumples the sheet—dented paper changes how graphite behaves.
Teaching 20 identical circles inside "Three Exercises for the First Week" only sticks when the student names the goal out loud. I ask for one sentence before the pencil moves: what should look different on the page in ten minutes? Without that, three exercises for the first week turns into doodling.
A checkpoint I use for 20 identical circles: daylight photo, zoom to one quarter of the sheet, compare to yesterday. If nothing moved, the issue is almost never talent—it is usually pressure, angle, or skipping the warm-up tied to three exercises for the first week.
When 20 identical circles feels stuck, shrink the task and lengthen the setup. Smaller format, two extra minutes of shoulder lines, same subject. Students who try to "power through" three exercises for the first week on a tired hand reinforce shake instead of fixing it.
Last month a student improved 20 identical circles by logging a single number after each session—line quality one to five. The drawings were not pretty for two weeks, but the curve climbed because three exercises for the first week stopped being a vague complaint and became a metric.
A 10-Step Value Strip
Divide a strip about eight by one inches into ten cells. Cell one stays white, cell ten as dark as possible without shine. Middle cells are even steps—discrete value scale practice.
Do not advance until the previous cell matches its neighbor in a desaturated photo. Merged steps mean you rushed pressure instead of layers.
Teaching a 10-step value strip inside "Three Exercises for the First Week" only sticks when the student names the goal out loud. I ask for one sentence before the pencil moves: what should look different on the page in ten minutes? Without that, three exercises for the first week turns into doodling.
A checkpoint I use for a 10-step value strip: daylight photo, zoom to one quarter of the sheet, compare to yesterday. If nothing moved, the issue is almost never talent—it is usually pressure, angle, or skipping the warm-up tied to three exercises for the first week.
When a 10-step value strip feels stuck, shrink the task and lengthen the setup. Smaller format, two extra minutes of shoulder lines, same subject. Students who try to "power through" three exercises for the first week on a tired hand reinforce shake instead of fixing it.
Last month a student improved a 10-step value strip by logging a single number after each session—line quality one to five. The drawings were not pretty for two weeks, but the curve climbed because three exercises for the first week stopped being a vague complaint and became a metric.
- Mark ten boxes with light HB.
- Fill box 2 with one HB layer at envelope pressure.
- Box 3: two HB layers or one 2B.
- Boxes 4–6: add layers, changing hatch angle each time.
- Boxes 7–9: introduce 2B without crushing.
- Box 10: 4B only if there is no glare; otherwise more 2B layers.
A Cube From Observation, Not Memory
Place a box or dice under a single lamp. Draw only three visible faces—no stickers. Light contour in HB, shadow in 2B. No ruler.
Memory cubes drift: edges parallel wrong way, shadow falls the wrong direction. Observation fixes that in one sitting. Shapes connect to the sphere, cube, cylinder exercise.
If faces merge, separate with value before outline. Brightest plane toward light, darkest opposite, middle on the third.
Teaching a cube from observation, not memory inside "Three Exercises for the First Week" only sticks when the student names the goal out loud. I ask for one sentence before the pencil moves: what should look different on the page in ten minutes? Without that, three exercises for the first week turns into doodling.
A checkpoint I use for a cube from observation, not memory: daylight photo, zoom to one quarter of the sheet, compare to yesterday. If nothing moved, the issue is almost never talent—it is usually pressure, angle, or skipping the warm-up tied to three exercises for the first week.
When a cube from observation, not memory feels stuck, shrink the task and lengthen the setup. Smaller format, two extra minutes of shoulder lines, same subject. Students who try to "power through" three exercises for the first week on a tired hand reinforce shake instead of fixing it.
Last month a student improved a cube from observation, not memory by logging a single number after each session—line quality one to five. The drawings were not pretty for two weeks, but the curve climbed because three exercises for the first week stopped being a vague complaint and became a metric.
Case Study: A Student Over Five Evenings
No names: adult beginner, zero experience, goal "not embarrassed to post progress." She arrived with twenty pencils and a glossy A5 book. We dropped extras and kept HB, 2B, and ten A4 sheets.
I did not promise a portrait in a week. We agreed on five evenings of twenty-five minutes plus warm-up. On day six she sent a photo of a cube and value strip—not museum level, but the line stopped scratching and shadow sat on the plane instead of beside it.
What the First Session Looked Like
Lines shook, pencil vertical, elbow glued to her side. The value strip had three steps: white, gray, shiny black. She said her hand "would not listen."
We skipped pretty subjects. Twenty minutes of lines and spirals, five of circles. Homework: same, plus daylight photo of the sheet. Without the photo she would not have noticed stronger pressure on the right side from tilting the board.
She erased every "bad" stroke to holes. We agreed the first five minutes stay messy so progress stays visible.
Teaching what the first session looked like inside "Case Study: A Student Over Five Evenings" only sticks when the student names the goal out loud. I ask for one sentence before the pencil moves: what should look different on the page in ten minutes? Without that, case study: a student over five evenings turns into doodling.
A checkpoint I use for what the first session looked like: daylight photo, zoom to one quarter of the sheet, compare to yesterday. If nothing moved, the issue is almost never talent—it is usually pressure, angle, or skipping the warm-up tied to case study: a student over five evenings.
When what the first session looked like feels stuck, shrink the task and lengthen the setup. Smaller format, two extra minutes of shoulder lines, same subject. Students who try to "power through" case study: a student over five evenings on a tired hand reinforce shake instead of fixing it.
Last month a student improved what the first session looked like by logging a single number after each session—line quality one to five. The drawings were not pretty for two weeks, but the curve climbed because case study: a student over five evenings stopped being a vague complaint and became a metric.
What We Changed About Pressure
From evening two we used "envelope signature" for HB and "slightly darker" for 2B. A scrap swatch sat beside the board for checks every three minutes.
We tilted the pencil and anchored the pinky. On evening four the ten-step strip passed a phone grayscale test—neighbors no longer merged.
One session at a standing counter unlocked her shoulder for that student—not universal, but worth trying if the elbow stays trapped.
Teaching what we changed about pressure inside "Case Study: A Student Over Five Evenings" only sticks when the student names the goal out loud. I ask for one sentence before the pencil moves: what should look different on the page in ten minutes? Without that, case study: a student over five evenings turns into doodling.
A checkpoint I use for what we changed about pressure: daylight photo, zoom to one quarter of the sheet, compare to yesterday. If nothing moved, the issue is almost never talent—it is usually pressure, angle, or skipping the warm-up tied to case study: a student over five evenings.
When what we changed about pressure feels stuck, shrink the task and lengthen the setup. Smaller format, two extra minutes of shoulder lines, same subject. Students who try to "power through" case study: a student over five evenings on a tired hand reinforce shake instead of fixing it.
Last month a student improved what we changed about pressure by logging a single number after each session—line quality one to five. The drawings were not pretty for two weeks, but the curve climbed because case study: a student over five evenings stopped being a vague complaint and became a metric.
Where She Got Stuck and How We Got Out
She stalled on the cube: edges equally black, faces one gray. We dropped outline on pass two and kept three values. A kneaded eraser lifted the top plane highlight—the cube clicked.
Social feeds were the other trap. One evening we drew only from the table—see drawing from life—without filters to compare against.
On evening five she repeated circles and cube alone. Success meant repeatability: second cube eight minutes faster with shadows in the same zones.
Teaching where she got stuck and how we got out inside "Case Study: A Student Over Five Evenings" only sticks when the student names the goal out loud. I ask for one sentence before the pencil moves: what should look different on the page in ten minutes? Without that, case study: a student over five evenings turns into doodling.
A checkpoint I use for where she got stuck and how we got out: daylight photo, zoom to one quarter of the sheet, compare to yesterday. If nothing moved, the issue is almost never talent—it is usually pressure, angle, or skipping the warm-up tied to case study: a student over five evenings.
When where she got stuck and how we got out feels stuck, shrink the task and lengthen the setup. Smaller format, two extra minutes of shoulder lines, same subject. Students who try to "power through" case study: a student over five evenings on a tired hand reinforce shake instead of fixing it.
Last month a student improved where she got stuck and how we got out by logging a single number after each session—line quality one to five. The drawings were not pretty for two weeks, but the curve climbed because case study: a student over five evenings stopped being a vague complaint and became a metric.
When to Move Into Digital
Digital does not replace paper at the start, but after a week of graphite it helps to mirror drills in a browser. You separate "I cannot see tone" from "I cannot set the brush."
I move students online after three stable ten-step strips on paper. Without a physical desk, paper warm-up on scrap still helps before screen time.
The Same Exercises in the Browser
Open a simple editor, canvas about 2000×2000 px, white background. Repeat spirals, lines, and the value strip. Sketch layer, tone layer—as in layers in a graphics editor.
On the online editor you can run the same fifteen-minute warm-up without installing software. Ignore paper texture presets until values match.
Import a photo of your paper strip and place the digital strip beside it. Ten to fifteen percent brightness between neighbors is the target in both places.
Teaching the same exercises in the browser inside "When to Move Into Digital" only sticks when the student names the goal out loud. I ask for one sentence before the pencil moves: what should look different on the page in ten minutes? Without that, when to move into digital turns into doodling.
A checkpoint I use for the same exercises in the browser: daylight photo, zoom to one quarter of the sheet, compare to yesterday. If nothing moved, the issue is almost never talent—it is usually pressure, angle, or skipping the warm-up tied to when to move into digital.
When the same exercises in the browser feels stuck, shrink the task and lengthen the setup. Smaller format, two extra minutes of shoulder lines, same subject. Students who try to "power through" when to move into digital on a tired hand reinforce shake instead of fixing it.
Last month a student improved the same exercises in the browser by logging a single number after each session—line quality one to five. The drawings were not pretty for two weeks, but the curve climbed because when to move into digital stopped being a vague complaint and became a metric.
Pen Pressure and Stabilization
Map pressure to size and opacity, but week one keep stabilization around fifty to seventy percent—not one hundred. Over-smooth lines hide problems paper already showed.
Soften the pressure curve if values jump. Details live in line stabilization and pressure.
Teaching pen pressure and stabilization inside "When to Move Into Digital" only sticks when the student names the goal out loud. I ask for one sentence before the pencil moves: what should look different on the page in ten minutes? Without that, when to move into digital turns into doodling.
A checkpoint I use for pen pressure and stabilization: daylight photo, zoom to one quarter of the sheet, compare to yesterday. If nothing moved, the issue is almost never talent—it is usually pressure, angle, or skipping the warm-up tied to when to move into digital.
When pen pressure and stabilization feels stuck, shrink the task and lengthen the setup. Smaller format, two extra minutes of shoulder lines, same subject. Students who try to "power through" when to move into digital on a tired hand reinforce shake instead of fixing it.
Last month a student improved pen pressure and stabilization by logging a single number after each session—line quality one to five. The drawings were not pretty for two weeks, but the curve climbed because when to move into digital stopped being a vague complaint and became a metric.
- brush size 40–80 px on a 2000 px canvas;
- opacity 15–25% for tonal fills;
- separate layer per "grade" like separate pencils;
- undo is not analysis—save versions between attempts.
Saving Files and Building a Habit
Export PNG nightly with the date in the filename. A "week1" folder on disk or cloud beats chasing likes. After a month compare first and last frame—tone improves before subject charm.
Alternate: one evening graphite only, next evening browser only with the same drill. Alternation beats quitting the feel of real pencil cold turkey.
Starting online from zero? Pair this with learn to draw online for common first-week traps.
At the paper-screen boundary: understand tone and pressure first, decorative brushes second—or the editor becomes an expensive filter toy.
For straight-line confidence before portraits, add five minutes from how to draw straight lines on alternate days—it compounds with shoulder warm-ups.
Teaching saving files and building a habit inside "When to Move Into Digital" only sticks when the student names the goal out loud. I ask for one sentence before the pencil moves: what should look different on the page in ten minutes? Without that, when to move into digital turns into doodling.
A checkpoint I use for saving files and building a habit: daylight photo, zoom to one quarter of the sheet, compare to yesterday. If nothing moved, the issue is almost never talent—it is usually pressure, angle, or skipping the warm-up tied to when to move into digital.
When saving files and building a habit feels stuck, shrink the task and lengthen the setup. Smaller format, two extra minutes of shoulder lines, same subject. Students who try to "power through" when to move into digital on a tired hand reinforce shake instead of fixing it.
Last month a student improved saving files and building a habit by logging a single number after each session—line quality one to five. The drawings were not pretty for two weeks, but the curve climbed because when to move into digital stopped being a vague complaint and became a metric.
Frequently asked questions
Which pencil should I start with—HB or 2B?
HB for light sketching and control, 2B for building tone. Two pencils and an eraser are enough for the first few months.
How much time per day should I practice pencil drawing?
15–25 minutes of focused practice with a warm-up beats two unstructured hours once a week.
Do beginners need a ruler?
Not in the first week. A ruler teaches the eye to be lazy. Train straight lines from the shoulder without tools.
Can I learn only from video?
Video shows an example, but without feedback on pressure you can lock in bad habits. Photograph your work in daylight and compare it to a reference.
Time to draw, not just read
Theory fades in a couple of days if you never use it. Open the editor and spend 15 minutes on what you just read. That is enough for the skill to stick.
Try it now
A free online editor: brushes, layers, a palette, and a shared canvas. No install and no sign-up.
Start drawingTopics in this guide
- how to draw with a pencil
- pencil drawing for beginners
- graphite pencil
- pencil drawing exercises
- learn to draw from scratch
← Contrast and Focus: How to Lead the Eye Through a Drawing HB, 2B, or 8B: Stop Drawing Everything With One Pencil →