Cube: the Base of Every Box
A cube shows every mistake in the open: shift one face, and the box goes askew. A phone, a book, a refrigerator, and a car body are the same cube, stretched along one side. Draw it see-through: mark the back edges with a light stroke, and the skew shows up right away.
Construction Through Perspective
Start with the nearest vertical edge. It sets the height of the whole box. Next you need a horizon line and two vanishing points set past the edge of the page. If vanishing points still feel intimidating, look at the breakdown of linear perspective and come back.
- Draw a vertical 5 cm tall. That is the nearest edge.
- Mark the horizon and place two vanishing points at its ends.
- Connect the top and bottom of the vertical to both points.
- Close the side faces with two shorter verticals.
- Build the three back edges with a thin line.
How to Check the Angles
Step two meters back from the page and squint. The lean shows up at once. In an editor it is faster: flip the canvas horizontally with one key. There is also a mechanical check: the nearest edge of a cube is always the longest, and the far faces narrow.
Sphere: Light and Shadow Only
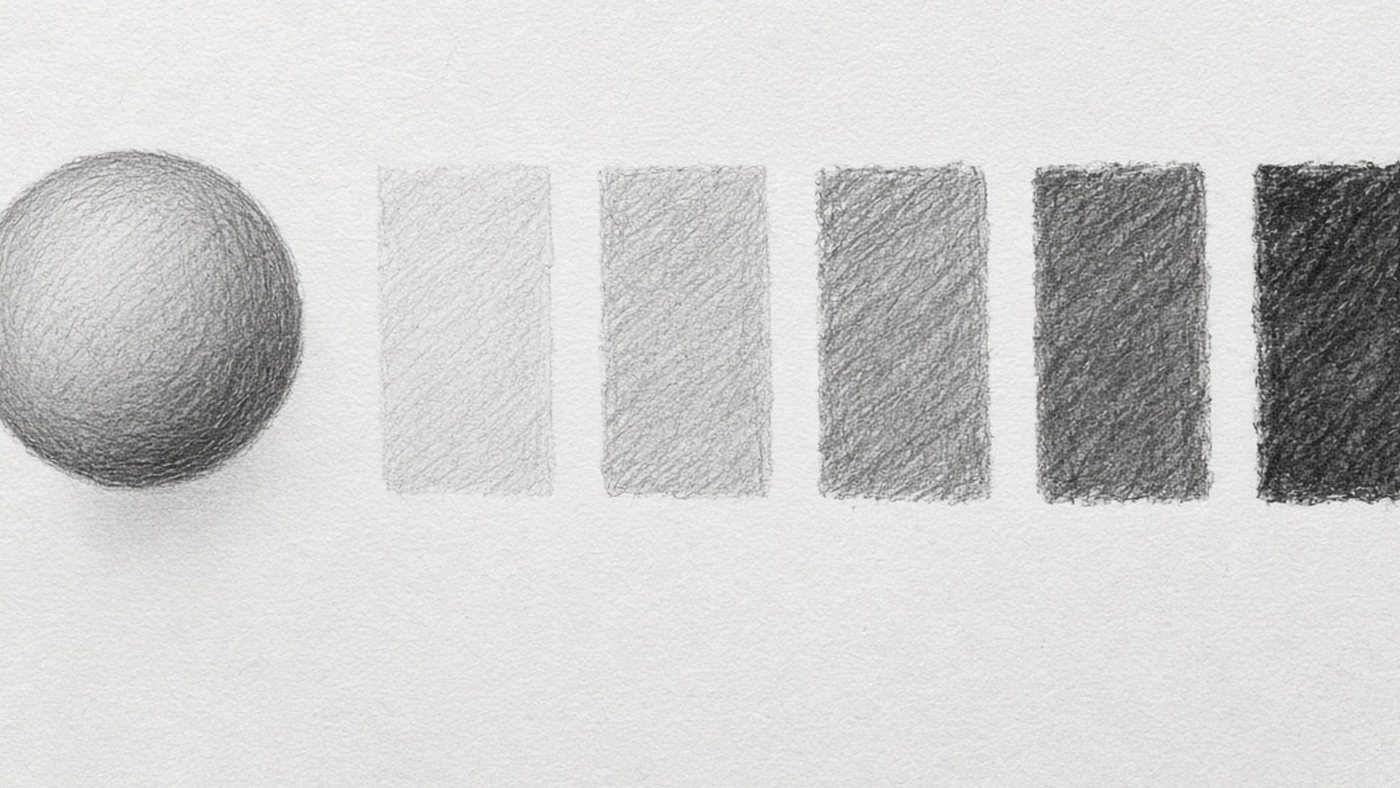
A sphere has no faces and no edges, so there is nowhere to hide value mistakes. The outline takes ten seconds. The volume takes half an hour.
A Circle Without a Compass
Draw the circle in a fast movement from the shoulder, laying five or six circles on top of each other. A slow line always comes out angular. Turn the page so your hand travels a comfortable arc.
Shadow That Follows the Form, Not the Outline
The main mistake is ringing the sphere with a gray band along the edge. Shadow falls in arcs that follow the curve of the surface. Hatch along those arcs, and the ball stops looking like a pancake. The five lighting zones are covered in the piece on light and shadow.
Common mistake
Many people put the darkest spot at the edge of the sphere. The form shadow is actually darkest a little closer to the center, and reflected light from the table lightens it near the edge.
Cylinder and Ellipses
A cylinder is a mug, a can, a tree trunk, and a wheel. The difficulty hides in the ellipses: a round base seen at an angle.
The Minor Axis Is Always Perpendicular
Draw the center axis of the cylinder first, and build the ellipses only after that. The minor axis of the ellipse has to lie exactly on that axis, at a right angle. Trace the ellipse in one motion, three or four times, until the shape evens out.
An Ellipse at Different Heights
The farther an ellipse sits from the horizon line, the more open it is. At eye level it collapses into a straight line. Set a mug on the table and slowly squat: the opening changes as you watch.
Cone and Complex Combinations
A cone is a lampshade, a skirt, a fir tree, and the sharpened tip of a pencil. It is built on the same ellipse, except the side lines meet at a point above the center of the base.
Cross Sections of a Cone
To keep a cone from floating, draw two or three horizontal sections inside it. Each one is an ellipse with the same minor axis, only narrower than the one before it. Those slices work like hoops on a barrel and hold the volume.
Compound Objects
Any complex object is a set of simple shapes. Take apart four things from your own table:
- a mug is a cylinder plus a bent cylinder for the handle;
- a lamp is a cone for the shade, a cylinder for the stem, and a sphere for the joint;
- a backpack is a cube with rounded edges;
- a ballpoint pen is a long cylinder and two cones.
This way of thinking is laid out in the article on building form.
Exercises
You do not learn geometry by reading. You train it with your hands. Fifteen minutes a day is enough if you do it for two weeks without skipping.
20 Shapes in Perspective
Fill a page with twenty cubes and cylinders at random angles: half above the horizon, half below. A 12-minute timer will keep you from overworking the lines. Draw every fifth shape see-through.
A Geometric Still Life in the Editor
Set a mug, a box, and an apple on the table, photograph them, and load the photo into the editor. Create a new layer over the photo and trace each object with its basic shape. Hide the photo and see whether the construction holds on its own. The same method works in a still life from life.
Time to draw, not just read
Theory fades in a couple of days if you never use it. Open the editor and spend 15 minutes on what you just read. That is enough for the skill to stick.
Try it now
A free online editor: brushes, layers, a palette, and a shared canvas. No install and no sign-up.
Start drawingTopics in this guide
- how to draw a cube
- how to draw a cylinder
- geometric shapes drawing
- ellipses in drawing
- basic forms for drawing
← Hatching: 7 Techniques That Give Volume and Texture See Like an Artist: 6 observation exercises →