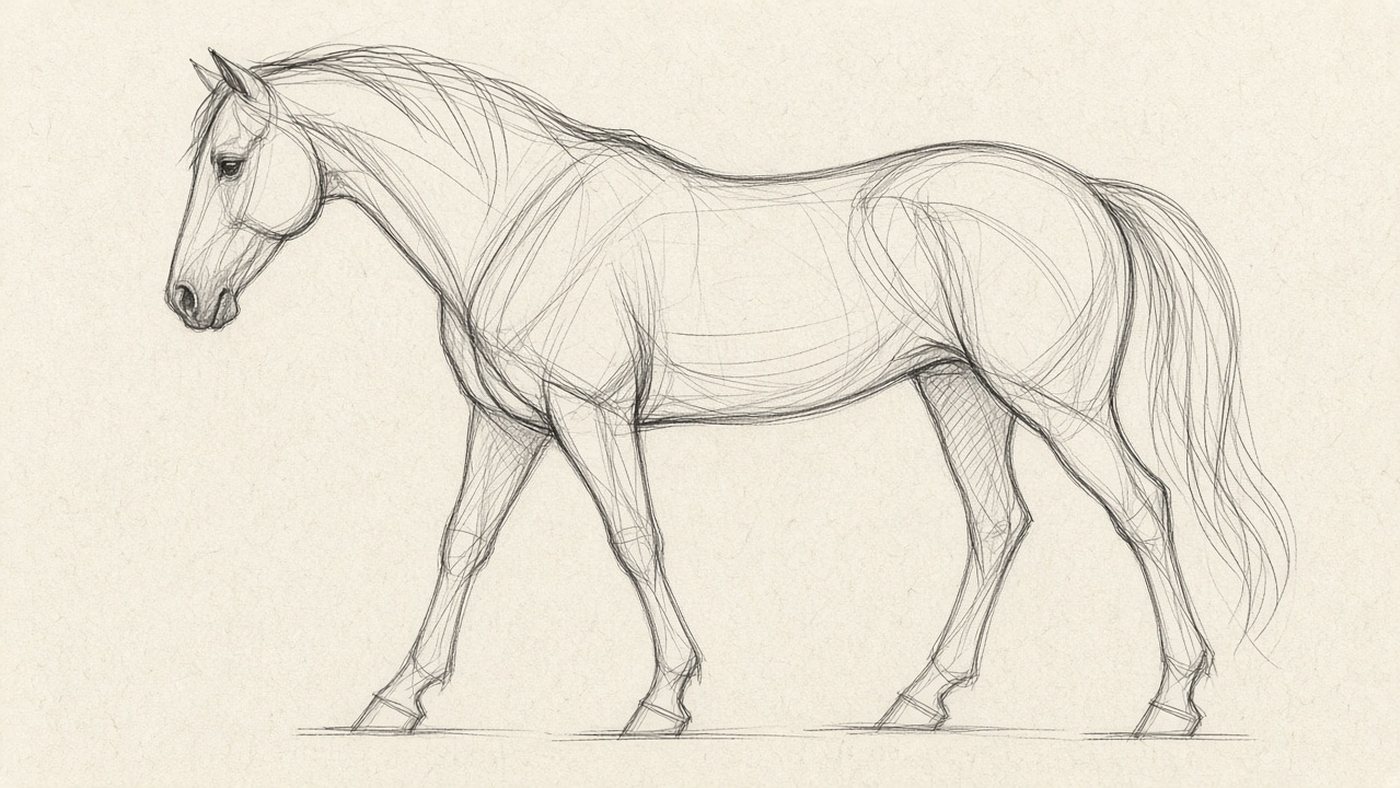
Framework: Chest, Belly, Pelvis
A horse stands on two heavy masses — chest and pelvis — with a long bridge of back between them. The belly does not hang like a sack: it tucks in softly but stays a volume that separates front from hind. Until three blocks agree in length and height, mane and highlights on the haunch only hide a “dog with a long neck” mistake.
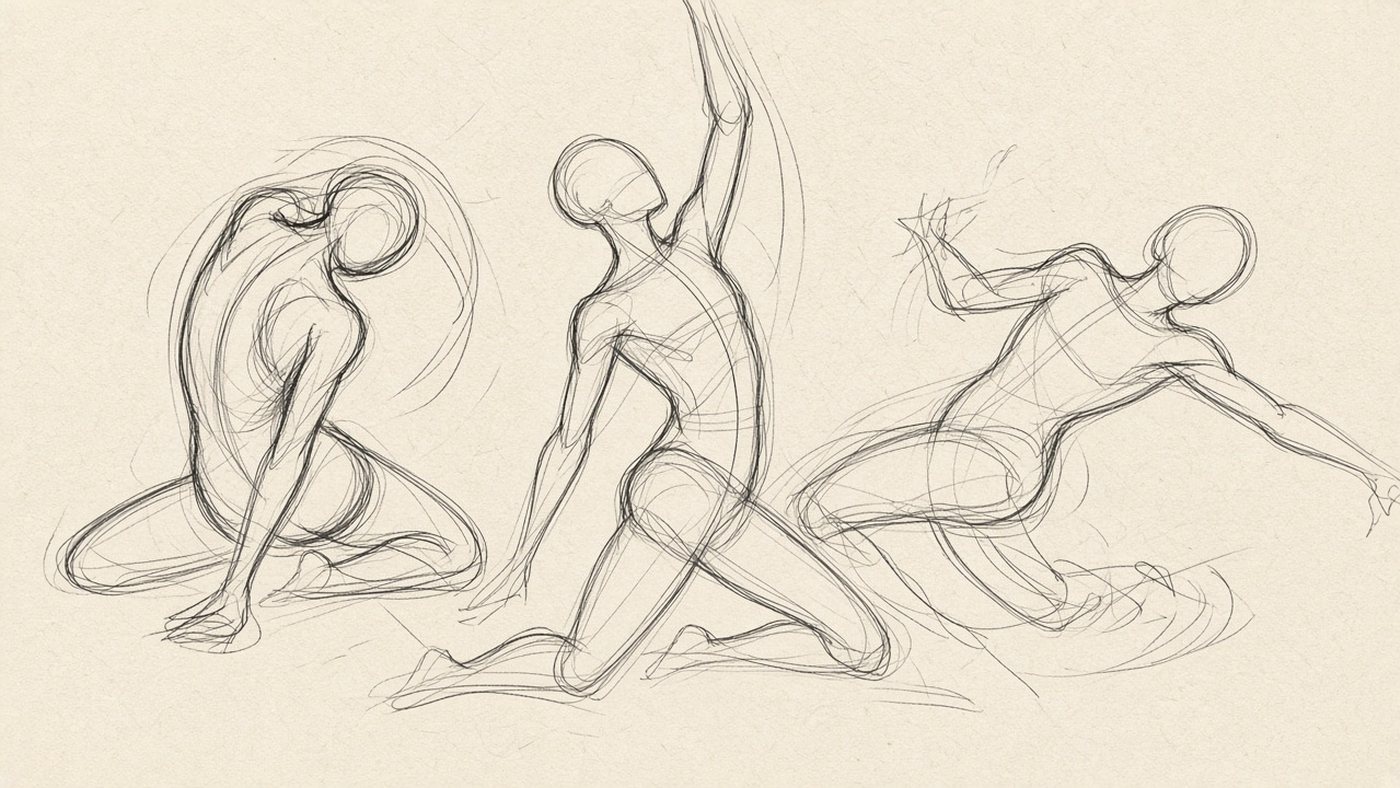
Three Ovals
The chest oval is the largest: it starts at the base of the neck and runs to the front-leg elbows. The bottom arc is not flat — between the legs the belly curves inward without collapsing to a line. The second oval is a shorter, softer belly link. The pelvis is the third block over the hind legs; on a thoroughbred it is round, on a draft horse wider and lower.
Compare the three ovals with drawing a dog and drawing a cat: a cat's pelvis is narrower, a dog's chest and pelvis are closer in size, a horse's chest dominates and the neck adds another third of silhouette length. If the middle oval matches the chest, the horse turns short-legged and thick.
Last week a student's chest oval was a circle like a ball. We lengthened it forward and dropped the withers — the “wrong” neck snapped into place without lengthening the muzzle. A three-form frame saves fixes at the finish.
Check: a vertical through the front leg at a stand passes through the front of the chest. A horizontal from elbow to haunch shows whether the back drifts. Those two lines beat any grid. More on volume in drawing form and volume.
On paper keep the HB light: ovals should erase when you refine the back. Do not outline the horse until you compare chest length to head length in profile — the head should not be longer than withers-to-haunch.
Draft breeds widen the belly oval but do not turn it into a second chest: mass still sits forward. Foals have closer-sized ovals, but build adult proportions now — even a simplified kid drawing wins with the same frame.
Leg Length
Legs are longer than memory: elbow to ground is nearly withers-to-haunch. The front leg is three segments — shoulder hidden in chest mass, forearm visible, wrist close to earth. The hind leg: thigh under the haunch, long shin, hock clearly above the hoof.
Beginners put the “knee” at belly height — on the front leg that joint is the elbow, and it sits high. The hind leg bends more in a gallop than at a stand; for a static sketch use one front foot forward and the opposite hind foot forward too.
Measure with a pencil: height at the withers ≈ two head lengths muzzle to poll. Leg height from ground to chest ≈ half withers height. Shorter legs look crouched; longer legs look giraffe-like.
Tilt the canvas to check digital sketches — proportions you forgive upright pop on flip. Same trick in sketching for beginners.
The hind leg pushes: thigh is powerful, shin long. Do not draw the hind “knee” where a human knee would be — the hock sits higher and reads as the main bend from the side.
Copy only the leg lines and ground line: if the silhouette looks like a table, shorten the body or lengthen the thigh. A three-minute leg check saves an hour of coat rendering.
Neck as Its Own Volume
The neck is not a cylinder glued to the chest — a muscular wedge from shoulders to skull. A horse neck is long but not giraffe-thin; a donkey neck is shorter and thicker.
Draw the neck as a curved bar from withers to skull base, then add mane as mass on one side. Mane first makes the neck break in an S-curve that is not there.
In three-quarter the neck overlaps the chest — hide lines on purpose. The head sits on the neck end, not on a human shoulder: the eye sits closer to the muzzle than a top-down photo suggests.
For quick sketches one gesture from withers to ear; mane detail after head angle matches body motion.
In a grazing pose the head drops — the neck arcs but the chest oval stays. Do not shrink the chest when the head is low; that is a common copy-from-photo mistake.
Legs and Joints
Legs are the main reason a horse “does not read.” Joints belong on the bone vertical, not on the outer silhouette. While legs are four sticks, no coat saves the drawing.
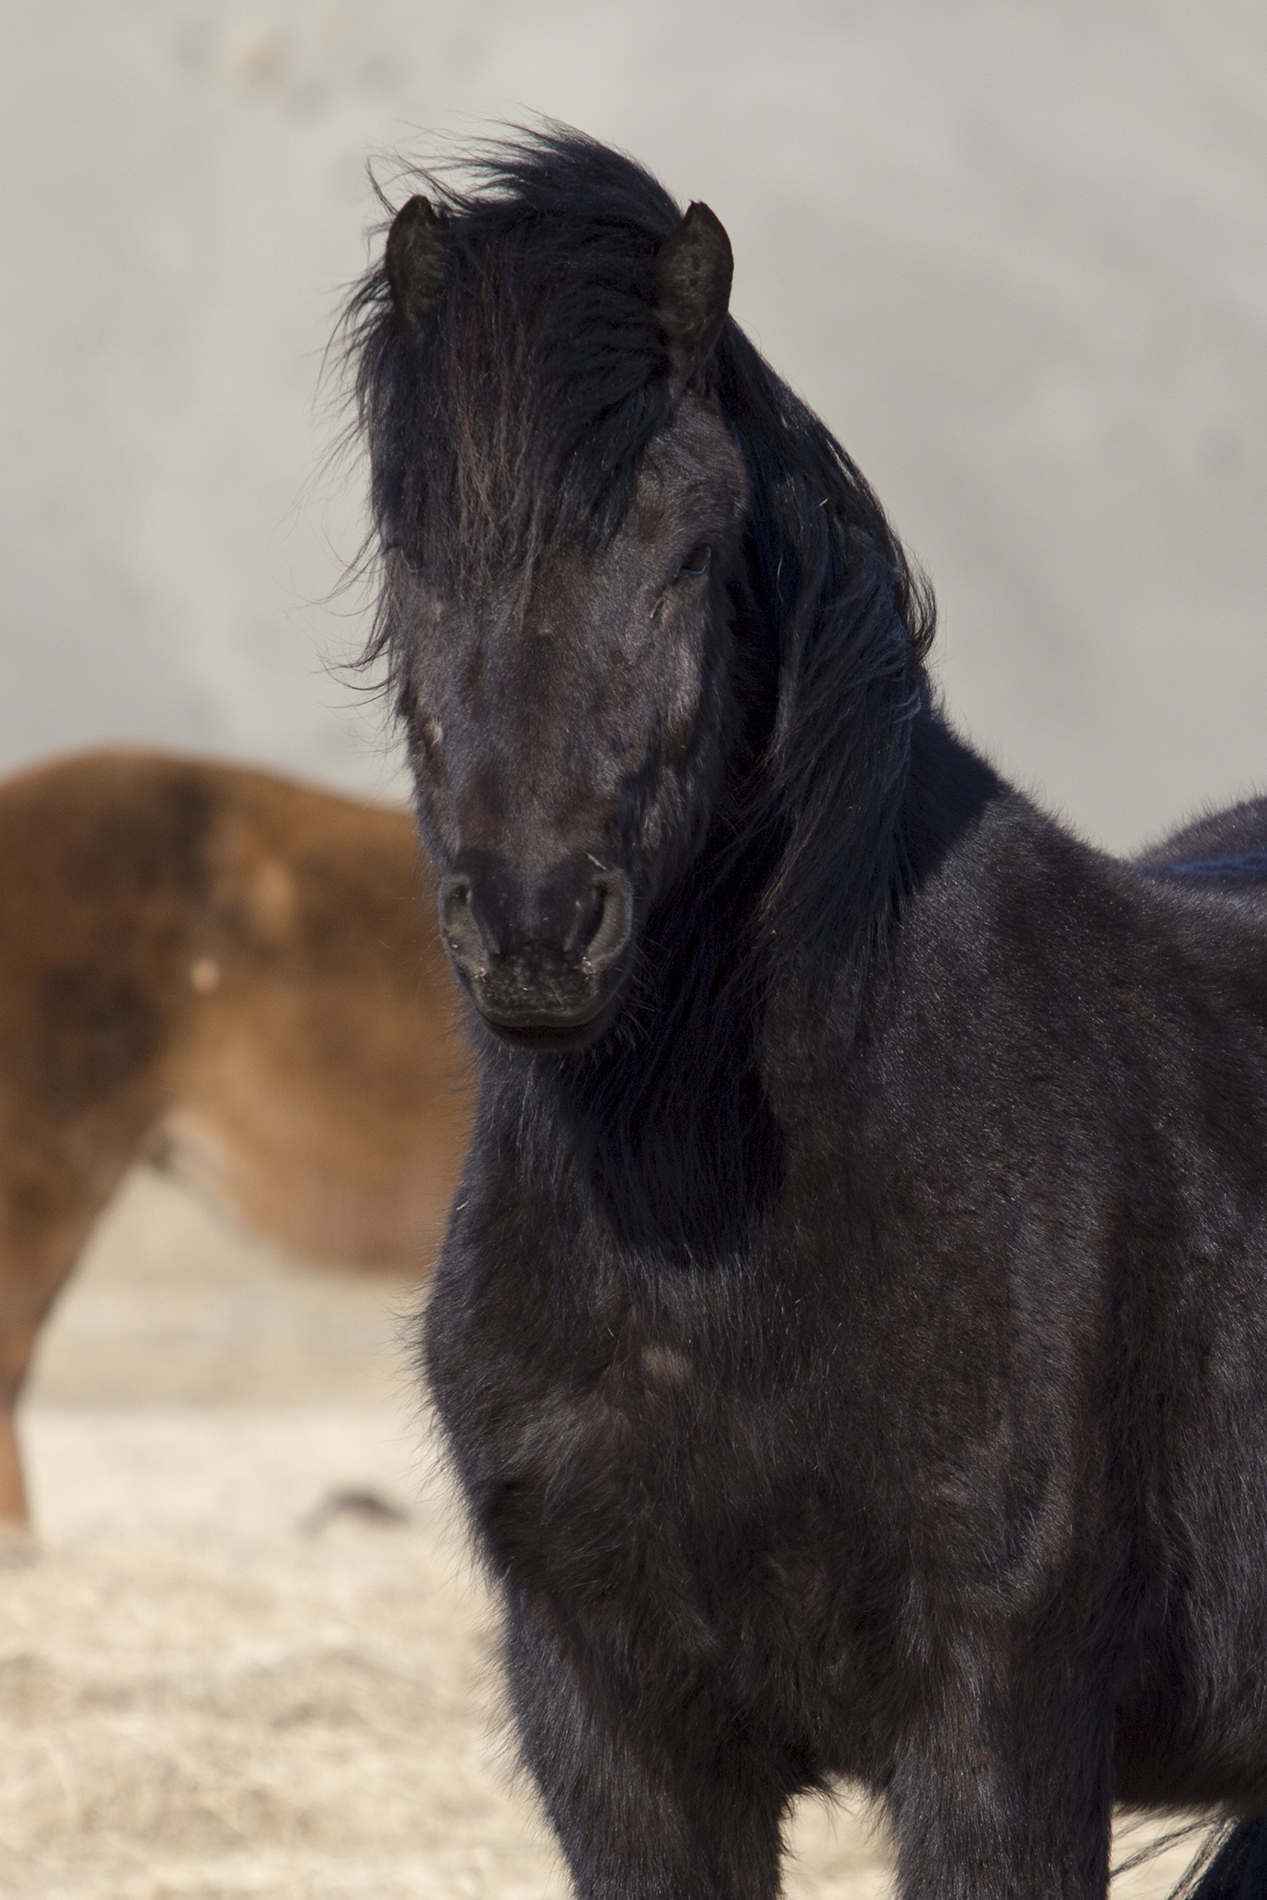
Knee vs Elbow
Front elbow points back and sits high on the chest; the hind “knee” is the hock, facing forward, mid-thigh. Swap them and the horse loses push.
Front bend goes back, hind bend forward. In profile the front wrist is near ground; the hind hoof is often slightly higher than the front at rest.
Compare horse anatomy diagrams: muscle hides bone but bends show in a side photo. Mark points on the photo and transfer — faster than contour copying.
A student had elbows at belly level — the horse looked short-legged. Moving bends to chest height fixed the silhouette immediately.
From behind, thigh bend can vanish in the haunch — hint it with one light break; do not overdraw muscles.
Hooves Are Not Dots
A hoof is a small block with rounded face, not a circle on a stick. It has volume: front face tilts, rear is shorter. Soft ground sinks the hoof; rock gives a crisp contact.
Hooves share one ground line — one high hoof makes the horse float. In a gallop hooves leave in sequence; for study pick one phase, not four parallel posts.
Hoof shadow is short at noon, long at dawn — same clock as light on the figure.
On a tablet, hooves on their own layer move as a group until the ground line matches.
In snow, hoof prints need a rim shadow — same grounding idea as a winter landscape.
Standing and Running
At rest weight sits on four legs but one hind leg often unloads slightly. Trot uses diagonal pairs; gallop lifts each hoof in turn.
For motion grab a video mid-stride: front extended, hind gathered — the classic run icon. Do not mix gaits on one drawing.
The back oscillates in a run but ovals hold: chest does not shrink to a ball, pelvis stays on the hind legs.
Ten small motion sketches beat one static detail. Same spirit as daily drawing practice.
Cover the head — if the body still reads as a horse, silhouette passed. If it becomes a bag, return to ovals.
Head and Muzzle
The head is narrow and long; the eye sits on the temple, not the cheek. The muzzle is a wedge with large nostrils; ears are mood antennas.
Eye on the Temple
The eye is large but not anime-sized — upper third of the head in profile. White shows at the side, pupil round. One bold corneal highlight, not five dots.
Drop the eye to the “cheek” and you get a donkey or cartoon. Test: a line from eye to nostril runs along the muzzle without diving down.
In three-quarter the far eye hides — do not draw both symmetrically. The near eye is the face accent.
Shoot reference at horse eye level; from above the muzzle shortens.
The brow ridge is bone, not a fluffy arc — shadow under it calms the gaze.
Nostrils
Nostrils are soft petals, not round holes. They flare in work, close slightly at rest. The nasal plane flows into the lip — no duck bill at the tip.
Shadow under nostrils and jaw separates muzzle from neck. Light usually comes from above-side as in light and shadow.
We compared three breeds: Arabian shorter muzzle, thoroughbred longer and narrower. One head frame, different wedge ratios.
Head-only study: wedge, eye, ear — no mane, no body.
After exercise, foam at the nostrils is a optional sport portrait detail.
Ears as Gesture
Ears rotate: forward attention, back irritation, sideways listening. Draw them as leaves on the skull, not triangles on the crown.
One ear folded, one alert livens the portrait. Symmetric “arrow” ears look toy-like.
Inner ear is darker in sun — mass, not hair-by-hair.
Simplify ears for kids but keep skull attachment or the head “falls off.”
Wind pushes ears back — align with mane direction.
Coat Without a Million Strokes
Coat reads as direction masses and mane contrast, not thousands of strokes. Light and shadow on the body first; long strokes only on mass edges.
Light Masses
Zones: withers and haunch lighter, belly and inner legs darker. Mane is a dark waterfall on one side of the neck, not a uniform cap.
Strokes follow form: withers to tail, chest to belly. Short coat — short strokes on bends; long mane — long arcs on the contour.
In an editor, tone on a separate layer; mane strokes above so you do not muddy the frame.
Scans lose halftone — check levels like export without quality loss.
Backlight gives a thin rim on the withers — one line, not a white outline around everything.
Mane in Blocks
Split mane into three to five “lock” masses like clouds. Leave gaps or it becomes one black slab. Start darkest at the neck base.
Tips need not be fully drawn — ragged edge and a few long lines enough. Wind follows scene motion.
Fix head tilt before mane — mane follows neck, not the reverse.
A swirl on the haunch is one or two accents, not body-wide ornament.
Braided mane reads as one thick rope silhouette first, texture second.
Highlight on the Haunch
The haunch is the second light accent after the withers. Highlight is soft and round, not a white sticker. Halftone around it, darker hips outside.
Tail continues the back line: attaches at haunch, mass below. In motion the tail lifts — shift its shadow on the thigh.
Coat highlights tie to surface — see textures and materials, but do not copy every breed at once.
Final move: contrast mane against the lit flank — light side may need a deeper mane.
Rain darkens the haunch and shrinks the highlight — lower contrast in overcast scenes.
Reference: Photo vs Video
Still photos give proportions; video gives motion phases. For study, one quality side view plus one stride frame is enough.
Frame From a Documentary
Documentaries often have neutral light and natural poses without show-ring tension. Pause when legs share one ground line.
Avoid wide-angle: it shortens the muzzle and stretches legs. Telephoto side view, camera at chest height, is ideal.
Save the frame and draw from reference, not from a childhood picture book.
Convert to grayscale if color distracts — masses pop faster.
Note breed only after the generic frame works.
Pause on Mid-Stride
Find front extended, hind gathered — poster run pose. Do not mix trot front with stand hind.
Keep two files: “anatomy stand” and “motion.” Mid-stride sells posters; stand teaches joints.
Overlay a semi-transparent frame on a screenshot to check angles.
Repeat the same stride frame three times in a week — leg progress shows before mane does.
Screenshot at native resolution — cropped legs hide wrist height.
Link to Dog and Cat
Quadruped frame rhymes: chest, pelvis, leg cylinders. Differences are leg length, neck, chest mass. If you draw dogs, move joint habits to horses without copying dog proportions.
Cats flex the spine more; horses are longer and stiffer between chest and pelvis. Sketch cat, dog, horse same day — differences stick.
Kids' horses can be three shapes but keep long neck and legs.
Compare frames with a friend on paint-online.art — they spot short necks instantly.
Rider comes after the horse frame — weight dips the withers slightly.
20-Minute Sketch in an Editor
A short digital sketch teaches you not to live in hair. Twenty minutes: frame, tone, one accent — stop.
- Canvas about A4 at screen-friendly resolution.
- “Frame” layer — contrasting color, 3–5 px brush.
- “Tone” layer — multiply, large soft brush.
- No coat texture until the timer rings.
- Export PNG and date the sketchbook entry.
- Weekly, compare six sketches — legs improve first.
Structure Layer
Keep the frame on its own layer until finish — erase coat without fear when fixing an elbow. Blue or red lines, not gray that vanishes in tone.
Lower stabilization on the frame so joint angles stay readable — see line stabilization.
I spend the first seven minutes on ovals and legs; if they fail, restart the timer instead of detailing.
Save layered files — in a month, new tone on an old frame shows growth.
Name layers “frame / tone / accent” so you do not paint fur on the skeleton.
Tone on Layer Two
On multiply, two or three grays: light on withers and haunch, halftone on belly, shadow under belly and legs. More than five steps eats the clock.
A silhouette clipping mask speeds fill — masks in layer masks.
One color accent — eye or nostril — wakes a gray sketch.
If tone muds, drop layer opacity to 40% and repass shadows only.
Lock the frame layer while toning so edges stay crisp.
Export
Portfolio PNG sRGB, long side 2000–2500 px. Hide the frame for finals; for teaching posts show before/after pairs.
Web and print formats — PNG and JPG overview; sketches live in PNG.
Filename with date and “horse” filters a year-long series.
Sketch together in a browser editor and compare frames on a call.
Do not auto-filter study files — filters hide weak frames.
If this is your first horse, aim for ten frames where legs touch earth and the neck is not shorter than the head — not a wall portrait. Label each sketch with time and one self-spotted error: “elbow low,” “flat haunch.” In a week you stop repeating the same mistake because you recognize joints before you reach the mane.
Horses in a herd use the same frame — scale small background silhouettes first, then the near horse. Do not enlarge the near one until ground line and withers height match the group. Same discipline as figures in a landscape.
Medium does not save proportions: charcoal, marker, and browser brushes need the same frame. If pencil beats tablet, you are probably painting coat on one layer — split frame and paint.
Add breed flavor after ten neutral runners. Arabian — higher withers, shorter muzzle; thoroughbred — longer legs, narrower head. Starting with breed lets you copy a pretty muzzle and skip the frame.
Foreshortening in a turned horse: near leg larger, far leg shorter. Balance is mass, not equal leg length. See foreshortening and ask what is closest to the camera.
Color after tone: warm sun side, cool shadow — coat runs warm in light, cold in stable shadow. Do not paint a red mane until gray volume holds.
Saddle and tack hide the withers on first studies — bare horse, then gear on another layer.
Background can be a ground strip and two sky values to test if the horse stands.
Revisit one reference monthly: pass one frame, pass two tone, pass three coat — progress on the same task beats comparing unrelated pieces.
“Head too small” fixes with neck length and muzzle wedge, not giant eyes.
Rider silhouette after the horse; weight slightly drops the withers line.
Month plan: week 1 legs, week 2 head and neck, week 3 coat masses, week 4 one color or background.
Flip the reference upside down — the brain stops “knowing horse” and sees lengths.
Fog version: lower contrast after a sharp pass — control atmosphere without losing proportions.
Ten minutes at a barn beats an hour of memory — three tiny silhouettes link drawing from life to home frame drills.
Tiny horses in frame: skip the eye dot; silhouette and motion read at distance.
Version filenames with dates — open first and last of the month and read leg progress without Instagram comparison.
Final checklist: one ground line, high elbows, round haunch, temple eye, block mane. Fix on a duplicate layer, not through coat.
Ask a friend “where is the support?” instead of “is it pretty?” — you look at the frame again.
Same frame in charcoal, pen, and digital teaches one skeleton in three materials.
Memory sketches: check against reference after the frame — memory shortens neck and simplifies legs.
Leave one rough stroke in mane or haunch — perfect smoothness can look sterile on study pieces.
Margin note: back length in “heads” — a number sticks better than “long horse.”
Crop to silhouette on white — if it still reads, the frame passed.
In class we compare two sketches for ground and neck only — in a week people argue about elbows, not hair. That means the eye matured.
Calendar “horse-frame” twice a week for twenty minutes — after eight sessions ovals go down automatically and one detailed piece per month is safe.
Ground line is the final exam: all hooves on one plane on flat terrain. Draw the horizon and fix support before calling it done.
When the near shoulder foreshortens, the chest oval looks like a circle — lengthen it along the spine before you trust the short side. Students often “fix” foreshortening by shrinking the whole horse; widening depth on the near shoulder is enough.
White markings on the face are design, not anatomy shortcuts — paint them after the muzzle wedge works in gray. A blaze cannot rescue a misplaced eye.
Night scenes drop local contrast but joints still need the same heights — silhouette read matters more than mane detail when values compress.
If you draw polo or racing gear later, the horse frame still comes first — tack follows volume; straps do not define the withers.
Photograph your pencil frame before adding tone — when digital work goes wrong, the photo is a reset button without guilt.
Anatomy books help after ten frames; before that they overwhelm. One side photo beats fifty diagram labels for your first month.
Try drawing the horse smaller on the page — beginners enlarge the head when the body fails; a smaller total size keeps proportions honest.
Mane blowing forward in a gallop overlaps the neck — draw neck mass first, then mane as a semi-transparent veil, not a helmet.
Cast shadow under the belly anchors the animal — without it, legs look pasted on even when joints are correct.
Compare your frame to general proportion exercises: horse back length in heads is a measurable drill like the classic eight-heads figure.
Use a perspective ground plane when you add a rider or fence — hooves must sit on the same plane as posts and rails.
Speed sketching ten heads in a row teaches muzzle wedge faster than one polished portrait with a wrong body.
Keep failed frames in the folder — label “elbows low” — and revisit after two weeks; the same error feels obvious once your eye upgrades.
Audio from a documentary while you frame trains your hand to work without chasing a perfect still — motion reference becomes normal.
If coat texture tempts you early, hide the top layer and spend five minutes on legs only — texture is a reward, not a hiding place.
Share only the frame layer with a mentor — critique on skeleton is kinder and faster than comments on hair direction.
Warm up with creative warm-ups: thirty seconds of leg sticks, then the twenty-minute horse — the sticks prime joint height.
Arabian vs draft is a second-year game; month one is generic runner until hooves and neck repeat without checking notes.
Print a tiny thumbnail of your frame — if it reads at stamp size, scale up with confidence; if not, fix before enlarging.
Snow, sand, and mud change hoof contact but not leg length — adjust shadow and sink, not the elbow position.
When you export, keep a frame-only PNG for social posts — audiences learn from process and you reinforce skeleton-first habits.
This checklist beside the desk beats memorizing the article: ground, elbows, haunch, eye, mane blocks — read it before each new sheet until automatic.
Side-by-side mirrors in the studio help less than flipping the canvas — mirror reverses left-right habits; flip catches vertical proportion drift.
When learning from sculpture, remember bronze mounts may straighten legs — trust living reference for bend and weight shift.
A horse turning its head only moves the neck wedge first — body ovals stay until the head angle locks; do not rotate the whole chest for a glance.
In digital, duplicate the frame layer before erasing — students undo less when the original sticks around as a ghost.
Graphite smudge on the haunch is not shading — keep smudge for background; body tone stays directional along muscle flow.
If the tail looks like a wire, add mass at the dock and let only the last third taper — hair weight starts thick.
Jumping poses need extra clearance under the belly — measure arc height from croup, not from a flattened spine.
Lying horses fold legs under the body — draw the compact oval stack before details; a standing frame pasted flat fails.
Foal studies use the same joints higher relative to body — shorter muzzle, but do not skip leg segments or they look like puppies.
Black horses need reflected light on the flank — pure black silhouettes lose haunch roundness; a cool rim saves volume.
Painted or spotted coats follow the same light zones — spots do not replace shading; they sit on top of mass.
Work larger than thumbnail but smaller than poster for month one — A4 or equivalent screen area is the sweet spot.
Record yourself drawing one frame — playback reveals when you skip measuring and jump to mane; awkward to watch, useful once.
Stable smell and sound are optional; what matters is observing one live horse long enough to see weight shift on a single hoof.
Combine this study with landscape practice by placing one small horse on a horizon line — integration beats isolated icons.
End each session by writing one sentence: what improved in the legs today — prose cements observation better than a vague “better.”
Crop reference to the horse only while learning — busy backgrounds steal attention from elbow height; isolate with a digital crop or paper window.
When both nostrils show in front view, the head is too square — narrow the muzzle wedge until one nostril dominates.
Practice ears alone on sticky notes — ten ears in two minutes trains skull attachment faster than full bodies with toy triangles.
If you use color, limit to three values plus one accent for month one — mane dark, flank light, belly mid, eye accent — same discipline as gray.
Re-read the opening framework section every tenth drawing — veterans still snap back to three ovals when a sketch “feels off” without obvious cause.
Timer discipline: when twenty minutes end, stop mid-stroke — the habit of stopping prevents overworking mane on a broken frame; you can start a fresh file tomorrow on the same reference.
Whiskers and eyelashes are optional garnish — add them after export if you must, but they never fix a wandering muzzle line.
Your first convincing horse will not be your prettiest — it will be the one where all four hooves share the ground and the neck length finally matches memory. Celebrate that file even if the mane is scratchy.
Save this page to favorites and open it before your next sketch — a sixty-second reread beats guessing which joint failed.
Tip
One good side reference and twenty minutes of frame daily for a week beat a “perfect” portrait with a short neck. Skeleton first, mane last — always.
- frame: three ovals + legs + neck;
- joints: elbows and hocks at the right height;
- head: temple eye, petal nostrils;
- coat: masses, not all-over hatching;
- reference: side + one motion frame;
- digital: separate frame and tone, export PNG.
Frequently asked questions
Do I start with the head or the body?
Start with the chest and the line of the back; add the head after the neck attaches to the shoulders.
How many references do I need?
One solid side view plus one motion shot is enough for a study drawing.
Do I need full horse anatomy?
Large masses and joints are enough at first; bone detail can wait until month two.
Does this work for kids’ drawings?
Simplify to three forms and bigger eyes — the same frame still helps.
Time to draw, not just read
Theory fades in a couple of days if you never use it. Open the editor and spend 15 minutes on what you just read. That is enough for the skill to stick.
Try it now
A free online editor: brushes, layers, a palette, and a shared canvas. No install and no sign-up.
Start drawingTopics in this guide
- how to draw a horse
- horse drawing
- horse proportions
- horse anatomy for artists
- horse sketch
← How to Draw Food: Volume, Highlights, and Appetizing Color A Dragon That Does Not Look Like a Chicken With Wings: Silhouette and Bones →